menu Menu SCOUTING EVERYWHERE search Search
arrow_back Back

Scouting Everywhere

The site is under development. Please bary the UI glitches.

Rope Coiling

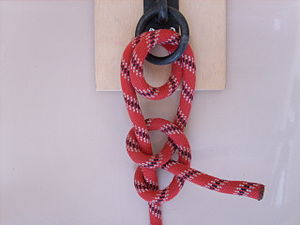
    In order to protect a rope from damage and to aid in transporting it, you need to be able to coil a rope properly. This can be done in a number of ways as shown. When coiling let the rope fall into natural loops. In order for this to happen it will be necessary to flick and turn the rope. Once completed the coil is secured by a whipping type knot or via a loop knot.

     When coiling a heavy hawser it is best to coil it in large loops on the ground. Passing the hawser through your legs will aid this process and prevent tangling. The coil is secured using short sisal ties.
Method 3


Method 1

Method 2


Ropes

75mm
    Ropes come in many types and sizes and to simplify matters you should use the following as a guide.

  • 75mm rope (25 mm diameter) or larger, certainly no smaller than 75mm, should be used  whenever it is intended to hold weight such as in the case of a monkey bridge - foot and hand rails, aerial runways, and commando rope bridges.
50 mm

  • 50 mm rope (16 mm diameter) should be used for ‘reeving’ up pulleysand anchors and for rope ladders.

    25mm
  • 25mm rope (8mm diametere) should be used for guy ropes in general, on large structures this size would need to be increased.
 
       Rope lenghts will vary according to how they are purchased, 25 metre lenghts will normally cover most projects as the distance between sheer legs or rope bridges should not exceed 15 metres to avoid ‘flipover’. Flipover occurs when the slack in the rope is such that it acts much like a skipping rope, when pressure is applied to the middle of the rope it becomes unstable and sways resulting in throwing off the ‘rope crosser’ or entangling them in the ropes, which is extremely dangerous. As most of the ropes used in pioneering structures require an element of friction to provide maximum efficiency, hawser laid ropes of natural fibre such as sisal or hemp are preferred, but they are more expensive and need care and attention as the fibres can rot and deteriorate if not dried carefully. Synthetic ropes are cheap but require extra care particularly when fixing the ropes to trees and poles. The ropes are generally smoother than hemp or sisal ropes and the knots have a tendency to slip under pressure. To ensure safety and prevent slippage you should secure all knots with extra hitches.


Round Turn And Two Half Hitches

Round Turn And Two Half Hitches

</b>

The two half-hitches is a type of knot, specifically a binding knot or hitch knot. It consists of an overhand knot tied around a post, followed by a half-hitch. Equivalently, it consists of a half-turn around a post followed by a clove hitch of the running end around the standing part.
This knot is also sometimes referred to as a clove hitch over itself.
The following three-step process for tying the two half-hitches is also explained in the image gallery below. Click on the images for high-resolution versions.
  1. Begin by forming a clockwise loop around the pole, with the working end of the rope on top. Bring the working end through the loop. At this point, you have an overhand knot around the pole.
  2. Bring the working end down and to the left. Loop it under the standing end. Pull the working end through the loop just formed, tighten, and slide the knot along the standing end up to the post.
  3. A correctly tied two half hitches resembles a clove hitch tied around the standing end of the line, not a cow hitch.
To release the knot, pry apart the two hitches with a bending motion. However, it can often be difficult to untie. To help avoid this problem, tie a slipped variation: in the second half-hitch, pass through a bight, as when tying your shoe, rather than the entire free end.

USES
       General-purpose hitch

Sheet Bend

Sheet Bend


    The sheet bend (also known as becket bend, weaver's knot and weaver's hitch) is a bend, that is, a knot that joins two ropes together. Doubled, it is effective in binding lines of different diameter or rigidity securely together, although it has a tendency to work loose when not under load.
   The sheet bend is related in structure to the bowline. It is very fast to tie, and along with the bowline and clove hitch is considered so essential it is knot №1 in the Ashley Book of Knots. It is a more secure replacement for the reef knot (square knot), especially in its doubled variety.

USES
     Joining two ropes of different diameters


Sheep Shank


Sheep Shank
   
        The sheepshank is a type of knot that is used to shorten a rope or take up slack. This knot is not stable. It can easily just fall apart under too much load or too little load.
The knot has several features which allow a rope to be shortened:
  • It provides two loops, one at each end of the knot which can be used to pass another rope through
  • The knot remains somewhat secure under tension; the coarser the rope the more secure it is (see Disadvantages, below)
  • The knot falls apart easily when tension is removed

USES
    Sheepshank knots are typically used for securing loads to trucks or trailers, and in sailing applications.
    Bear Grylls uses a modification of this knot by cutting one of the lengths of rope in the knot, while rappelling down an edge during the Ireland episode of Man vs. Wild in order to retrieve his rope at the bottom by severing the middle leg of the sheepshank knot before his descent. He refers to it as a "kazikame" knot.

Bowline


Bowline
       
      The bowline is an ancient and simple knot used to form a fixed loop at the end of a rope. It has the virtues of being both easy to tie and untie. Although generally considered a reliable knot, its main deficiencies are a tendency to work loose when not under load and the bight portion of the knot to capsize in certain circumstances. To address these shortcomings, a number of more secure variations of the bowline have been developed for use in safety-critical applications.
       The structure of the bowline is identical to that of the sheet bend, except the bowline forms a loop in one rope and the sheet bend joins two ropes. Along with the sheet bend and the clove hitch, the bowline is often considered one of the most essential knots.
        The bowline is sometimes referred as King of the knots because of its importance. It is one of the four basic maritime knots (the other three are figure-eight knot, reef knot and clove hitch).
USES
        The bowline is used to make a loop at one end of a line. It is tied with the rope's working end (aka bitter end). The loop may pass around or through an object during the making of the knot. The knot tightens when loaded at (pulled by) the standing part of the line.
      The bowline is commonly used in sailing small craft, for example to fasten a halyard to the head of a sail or to tie a jib sheet to a clew of a jib. The bowline is well known as a rescue knot for such purposes as rescuing people who might have fallen down a hole, or off a cliff onto a ledge. They would put it around themselves and sit on the loop. This makes it easy to heft them up away from danger. The Federal Aviation Administration recommends the bowline knot for tying down light aircraft.
       A rope with a bowline retains approximately 65% of its strength at the location of the knot, although in practice the exact strength depends on a variety of factors.


Clove Hitch

Clove Hitch

The clove hitch is a type of knot. Along with the bowline and the sheet bend, it is often considered one of the most essential knots. It consists of two opposed half hitches made successively around an object. It is most effective used as a crossing knot. Although it can be used as a binding knot, it is not particularly secure in that role. A clove hitch made around the standing part of the line is known as either two half-hitches or buntline hitch, depending on whether the half-hitches progress away or towards the hitched object.
     The clove hitch can slip when loaded. In smaller diameter cords, it may jam and become difficult to untie after being heavily weighted. It is also very unreliable when used to hitch to a post with sharp corners. The knot is useful in situations where the length of the running end needs to be adjustable.
      To tie a clove hitch, first place a loop around the pole, with the working end of the rope on top. Run the working end round the pole once more until you meet the place where the ropes cross, then pass the working end under the cross. Pull to tighten.
It can also be formed in the bight, that is in the middle of a rope, without either end available. To tie it this way, form two back-to-back overhand loops in a rope, and then put the top loop underneath the bottom one. Drop both loops over a post and tighten. Be sure it looks just like the knot pictured here, as it is easy to twist the ends in the wrong direction. This way of tying clove hitch is used for instance at belaystations of multi pitch climbs.

USES
The clove hitch is commonly used in scouting to start and finish a lashing such as the square lashing, diagonal lashing and sheer lashing.

Reef Knot


Reef Knot

The reef knot or square knot is an ancient and simple binding knot used to secure a rope or line around an object. Although the reef knot is often seen used for tying two ropes together, it is not recommended for this purpose due to potential instability of the knot.
A reef knot is formed by tying a left-handed overhand knot and then a right-handed overhand knot, or vice versa. A common mnemonic for this procedure is "right over left, left over right", which is often appended with the rhyming suffix "... makes a knot both tidy and tight". Two consecutive overhands of the same handedness will make a granny knot. The working ends of the reef knot must emerge both at the top or both at the bottom, otherwise a thief knot results.
USES

The reef knot is used to tie the two ends of a single line together such that they will secure something, for example a bundle of objects, that is unlikely to move much. In addition to being used by sailors for reefing and furling sails, it is also one of the key knots of macrame textiles.
The knot lies flat when made with cloth and has been used for tying bandages for millennia. As a binding knot it was known to the ancient Greeks as the Hercules knot (Herakleotikon hamma) and is still used extensively in medicine. In his Natural History, Pliny relates the belief that wounds heal more quickly when bound with a "Hercules knot".
It has also been used since ancient times to tie belts and sashes. A modern use in this manner includes tying the obi (or belt) of a martial arts keikogi.
With both ends tucked (slipped) it becomes a good way to tie shoelaces, whilst the non-slipped version is useful for shoelaces that are excessively short. It is appropriate for tying plastic garbage or trash bags, as the knot forms a handle when tied in two twisted edges of the bag.
The reef knot figures prominently in Scouting worldwide. It is included in the international membership badge and many scouting awards. In the Boy Scouts of America demonstrating the proper tying of the square knot is a requirement for all boys joining the program.

ScoutCraft


        Scoutcraft is a term used to cover a variety of woodcraft knowledge and skills required by people seeking to venture into wild country and sustain themselves independently. The term has been adopted by Scouting organizations to reflect skills and knowledge which are felt to be a core part of the various programs, alongside community and spirituality. Skills commonly included are camping, cooking, first aid, wilderness survival, orienteering and pioneering.

Origins

For Europeans, Scoutcraft grew out of the woodcraft skills necessary to survive in the expanding frontiers of the New World in the eighteenth and nineteenth centuries. Frontiersmen such as Daniel Boone needed these skills to travel through the uncharted wildernesses and difficult terrains. But Scoutcraft was practiced by the Native Americans long before the arrival of the colonists and it was from Indian scouts that the art of Scoutcraft, or Woodcraft as it was more commonly known in the American Old West, passed to the early European pioneers.
As the nineteenth century moved on, Scoutcraft began to be adopted by parts of some military forces, as the way in which wars and battles were fought changed. The American scout Frederick Russell Burnham brought Scoutcraft to Africa and, in the Second Matabele War, he introduced it to Robert Baden-Powell, the founder of the Scouting movement. Baden-Powell first began forming his idea for a programme of training young men in Scoutcraft whilst scouting with Burnham in Matobo Hills, Matabeleland (now part of Zimbabwe). Later, Baden-Powell wrote a number of books on the subject, and even started to train and make use of adolescent boys, most famously during the Siege of Mafeking, during the Second Boer War.

Scouting

After the Second Boer War, Baden-Powell enjoyed a celebrity status for his command at Mafeking. He set about writing a new book, Scouting for Boys, which was published in 1908. This was removed from his earlier, more martial works, but kept the idea of Scoutcraft as a core part of the Scouting program. Some critics accused Baden-Powell of trying to create a pseudo-military organisation, but he was quick to distance himself and Scouting from his earlier military experiences, and instead pointed out the importance of self-reliance, duty and thoughtfulness which his new program promoted.
In order to test that a new member had earned the title of Scout, Baden-Powell devised a number of tests for them to complete, including knot-tying, animal tracking, first aid, navigation, and fire-lighting. Other tests listed by Baden-Powell include having sixpence in a bank, and knowing about the Union Flag and its significance— these latter tests are generally not included in Scoutcraft in more recent times. Similar books were published in America by Ernest Thompson Seton, a pioneer of the Scouting movement in the United States.
Scoutcraft is still a core part of many organisations' programs. The Scout Association of the United Kingdom lists the following benefits of Scoutcraft:
  • encourages self reliance, resourcefulness and confidence in their own ability
  • develops skills to be used in the outdoors
  • provides training for what to do in emergency situations

Skills

An example list of Scoutcraft skills, taken from 1964's Boy Scout Handbook (sixth edition) includes:
  • Camp Cooking
  • Camp Health
  • Camp Preparation
  • Cleanup
  • Edible Wild Plants
  • Finding Directions
  • Fire Building
  • First aid
  • Hiking
  • Knowing Trees and Shrubs
  • Lashings
  • Map Reading
  • Map Sketching
  • Preparing Firewood
  • Selecting [a] Campsite
  • Signaling
  • Swimming
  • Tent Pitching
  • Use of [a] Compass
  • Using [an] Axe in Camp
  • Wildlife

A-List of Knots


  • Adjustable bend
  • Adjustable hitch
  • Adjustable loop
  • Albright knot
  • Alpine butterfly bend
  • Alpine butterfly knot
  • Alpine coil
  • Alternate ring hitching
  • Anchor bend
  • Angler's knot
  • Angler's loop
  • Arbor knot
  • Artillery loop aka manharness knot
  • Ashley's bend
  • Ashley's stopper knot
  • Axle hitch

B-List of Knots


  • Bachmann knot
  • Bag knot
  • Bait loop
  • Bale sling hitch
  • Barrel hitch
  • Barrel knot
  • Barrel sling
  • Becket hitch
  • Beer knot
  • Bimini twist
  • Blackwall hitch
  • Blake's hitch
  • Blood knot
  • Blood loop knot
  • Boa knot
  • Boom hitch
  • Bottle sling
  • Bowen knot
  • Bowline
  • Bowline on a bight
  • Bumper knot aka egg loop
  • Buntline hitch
  • Butterfly knot

C-List of Knots


  • Carrick bend
  • Carrick mat
  • Cat's paw
  • Catshank
  • Chain sinnet
  • Chain stitch
  • Clove hitch
  • Common whipping
  • Constrictor knot
  • Continuous ring hitching
  • Corned beef knot
  • Cow hitch
  • Cow hitch and bowline
  • Cowboy bowline

D-List of Knots


  • Diagonal lashing
  • Diamond knot
  • Directional figure eight
  • Dogshank
  • Double anchorman knot
  • Double bowline
  • Double carrick bend
  • Double constrictor knot
  • Double Englishman's knot
  • Double figure eight bend
  • Double figure eight
  • Double fisherman knot
  • Double loop
  • Double overhand
  • Double pile hitch
  • Double sheet bend
  • Double windsor (for use in neckties)
  • Dropper loop
  • Dutch marine bowline

E-List of Knots


  • Egg loop aka bumper knot
  • Englishman's knot
  • Eskimo bowline
  • European death knot
  • Eye splice

F-List of Knots


  • Falconer's knot
  • Farmer's loop
  • Farrimond friction hitch
  • Fiador knot
  • Figure-of-eight follow through
  • Figure-of-eight knot aka savoy knot, Flemish knot
  • Figure-of-eight loop
  • Fireman's chair knot
  • Fisherman's bend
  • Fisherman's knot
  • Flemish bend
  • Flemish knot aka figure-of-eight knot, savoy knot
  • French bowline

G-List of Knots


  • Garda hitch
  • Granny knot
  • Grief knot
  • Ground-line hitch

H-List of Knots


  • Hackamore
  • Half blood knot
  • Half hitch
  • Halter hitch
  • Handcuff knot
  • Hangman's noose
  • Harness bend
  • Harness hitch
  • Heaving line bend
  • Highwayman's hitch
  • Hitching tie
  • Honda knot aka lariat loop
  • Hunter's bend aka rigger's bend

I-List of Knots


  • Icicle hitch
  • Improved clinch knot
  • In-line figure 8 loop
  • Italian hitch

J-List of Knots


  • Jack Ketch's knot
  • Jug sling aka bottle sling
  • Jury mast knot

K-List of Knots


  • Killick hitch
  • Klemheist knot

L-List of Knots


  • Lariat loop aka honda knot
  • Lark's foot
  • Lark's head
  • Left-hand bowline
  • Ligature knot aka surgeon's knot
  • Lighterman's hitch
  • Lineman's loop
  • Lissajous knot
  • Lobster buoy hitch

M-List of Knots


  • Magnus hitch
  • Manharness knot aka Artillery loop aka harness hitch
  • Matthew Walker's knot
  • Marlinespike hitch
  • Midshipman's hitch
  • Miller's knot
  • Monkey's fist
  • Munter friction hitch

N-List of Knots


  • Nail knot
  • Noose

O-List of Knots


  • One-sided overhand bend
  • Ossel hitch
  • Overhand bend
  • Overhand knot with draw-loop
  • Overhand knot aka thumb knot
  • Oysterman's stopper knot

P-List of Knots


  • Packer's knot
  • Palomar knot
  • Pile hitch
  • Poldo tackle
  • Pratt knot
  • Prusik knot
  • Portuguese bowline aka French bowline
  • Portuguese whipping
  • Power cinch

R-List of Knots


  • Racking bend
  • Reef knot
  • Rigger's bend aka Hunter's bend
  • Ring bend
  • Ring hitch
  • Ring knot
  • Rolling hitch
  • Rosendahl bend
  • Round turn and two half hitches
  • Round turn
  • Running knot

S-List of Knots


  • Sailor's hitch
  • Sailors knot aka Carrick bend
  • Savoy knot aka figure-of-eight knot, Flemish knot
  • Sheepshank
  • Sheet bend
  • Siberian hitch
  • Simple knot
  • Single carrick bend
  • Single hitch
  • Slip knot
  • Slipped buntline hitch
  • Slippery eight loop
  • Slippery hitch
  • Snell Knot
  • Snuggle hitch
  • Span loop
  • Spanish bowline
  • Splice
  • Square knot
  • Square lashing
  • Square turk's head
  • Stein knot
  • Stevedore knot
  • Strangle knot
  • Strap hitch
  • Surgeon's knot aka ligature knot
  • Surgeon's loop

T-List of Knots


  • Tarbuck knot
  • Taut-line hitch
  • Tent hitch
  • Thief knot
  • Thumb knot aka overhand knot
  • Tiggap knot
  • Timber hitch
  • Tom fool's knot
  • Trefoil knot
  • Trident loop
  • Triple bowline
  • Triple crown knot
  • Triple fisherman's knot
  • Trucker's hitch
  • True lover's knot
  • Tug boat hitch
  • Turle knot
  • Twined turk's head
  • Two half hitches
  • Two strand overhand knot

U-List of Knots


  • Uni knot

V-List of Knots

  • Versatackle knot
  • Vibration-proof hitch

W-List of Knots


  • Wagoner's hitch
  • Water bowline
  • Water knot
  • Waterman's knot
  • West country whipping
  • Windsor knot

Y-List of Knots


  • Yosemite bowline

Z-List of Knots


  • Zeppelin bend
  • Zeppelin loop

Lashings

   
  Experience would suggest that the best lashing to use in the construction of the projects is not the traditional square lashing but rather the Norwegian lashing which is easier and quicker to tie than the traditional lashing. With the Norwegian lashing the sisal or lashing rope is halved and you are constantly pulling the strain against yourself which makes it easy to tighten and manage the construction of the lashing plus you finish it off with a reef knot or granny knot which ever is easiest. Once you master the technique it can be adapted to the other lashings - Tripod, Diagonal, Sheer.

Pioneering

     Pioneering or Scout engineering refers to the work of military engineers who went ahead of the army on foot, to build bridges, roads and to generally prepare the way. They got there first, often in the wilderness, and had to make do with what they could find, or carry. With axes and ropes they worked wonders and created many functional structures. In Scouting we carry on this tradition as it provides Patrols with a challenge and an opportunity to develop as a team and  achieve something worthwhile. Before building it is necessary to have an understanding of the skills involved as well as enthusiam. Firstly, it is necessary to know how to tie the required knots and lashings, secondly, you must have spars or poles from which to build your project. The next consideration is ropes and pulleys to bridge and secure your project and lastly some know how and loads of common sense.
 
Each project should be approached in a logical way:-
  • What are we trying to do
  • What equipment do we have
  • What is the best way to use this
  • Equipment
  • Designing the project
  • Planning the steps to complete the project
  • Testing and safety
  • Dismantling the project
    Every project should be approached in this way. The designs suggested are tried and tested however you rarely find a level river bed or trees in the right places for rope bridges etc. so each of the basic designs suggested will have to be modified to suit the conditions you encounter.

Compass Method

Compass Method

Measuring Widths
      Locate an object on the other side of a river. Stand on your side and point the direction-of-travel arrow towards the object. Align the magnetic needle to 45O indicator of the compass housing. Pace the line BC while pointing the direction-of-travel arrow towards the object all the time. Point C is marked when the compass is oriented (magnetic needle is directly above the orienteering arrow). The distance BC is a rough estimate of distance AC. You have just formed a 45-45-90 triangle, which has two of its sides equal to each other.

Stride or Step Method

Stride or Step Method

Measuring Widths
          Select an object on the opposite side of the river, such as a tree and we mark it as A. Mark the point directly in front of the object on the opposite side of the river, mark it as point B. Take at least 50 paces to point C, so as to form line BC. Note that line BC should be perpendicular to line AB. Mark point C with a stick or another person. Again, pace another distance to point D. The distance CD is half the distance of BC. From point D, pace another distance to point E. Line DE is parallel to line AB. Point E is marked on a location wherein you can see point C forming a straight line with point A. Meaning when you look at the stick on point C. it somewhat blocks your line of sight to point A. The distance AB is twice the distance DE. AB = DE x 2. We can alter the method a bit. Instead of having distance CD half the distance between BC, we can make it equal to each other. Do the same method to find point E. Using this alternative, AB=DE. This is more accurate.

Napoleon Method

Measuring Widths
             Stand on one shore of a stream. Bow your head, chin against your chest. Hold your hand to your forehead in a salute. Move your hand down until the front edge of it seems to touch the opposite shore. Without changing the position of your hand, make a quarter turn. Notice the point at which the edge of your hand seems to touch the near shore. Pace off the distance to that point, and you will know the width of the river. Napoleon might have used the brim of this hat instead of his hand. If you are wearing a cap with a visor, so can you.

Inch-to-Foot Method

Inch-to-Foot Method

Measuring Heights
        From the foot of the object you are to measure pace eleven (11) units, we label it distance AB. A unit can be any number of paces, so if we say our unit is five paces then 11 units is equivalent to 55 paces. Place something to mark the point B. From B take one more unit forward, this is distance BC. From location C lie down on the ground such that your eyes are close to the ground as possible. Sight the tree with the marker on B in your line of sight. Note where your line of sight cuts the marker to the tip of the tree. That spot is labelled as D. The distance of BD in inches is the estimated height of tree in feet.

Shadow Method

Shadow Method
Measuring Heights
              The method can be used only if the sun is able to cast a shadow. First is we measure the shadow cast by the tree (from the base of the tree to the shadow of it's top), we label this length as AB. We then measure the shadow cast by someone or an object of known height, we label this as CD.
                              
We merely solve the unknown height by use of proportions, by equating:
         AB KNOWN                 AB - Length of the shadow cast by tree
UNKNOWN = ----------------------, where
           CD               CD - Length of the shadow cast by a known height

Tree-felling method

Tree-felling method
Measuring Heights
      Back away from a flagpole or tree that you want to measure. Hold a stick upright at arm's length. Sight over the stick so that its tip appears to touch the top of the pole and your thumb is at its base. Swing the stick 90 degrees to a horizontal position as if the flagpole were falling. Keep your thumb at the base of the pole, and notice where the tip of the stick seems to touch the ground. Pace the distance from that point to the base of the flagpole to get its height.

Pencil Method or Proportional Method

Pencil Method or Proportional Method
Measuring Heights  
       Have a friend whose height you know stand beside a tree, or tie a ribbon around the tree at your own height. Step back and hold a pencil or a stick at arm's length in front of you. With one eye closed, sight over the stick so that the top of it appears to touch the ribbon or your friend's head. Place your thumbnail on the stick where it seems to touch the base of the tree. Now move the stick up to see how many times this measurement goes into the height of the tree. Multiply that number by the height of your friend or the ribbon, and you will know the height of the tree. You can also use this method to measure buildings, waterfalls, and walls.
share Share linkedin Twitter Facebook Google+